Ready-made platform
Run it on W2P Solution
A white-label print store with a built-in designer, print pricing rules and a production queue, set up and hosted by the Netbase team on a yearly plan.
A promotional product designer places a customer's artwork inside the imprint area of one item at a time - a mug's wrap, a pen's barrel, a bag's panel - then routes it to the file a decoration method needs: a single-colour vector path for engraving, or a full-colour raster file for print. Each item and method has its own rules.
Start a project brief Try the live demoReviewed by CEO, Netbase JSC · Published 1 Oct 2026 · Updated 1 Oct 2026

A photobook or a t-shirt has a flat, rectangular print area; a mug, a pen or a tote bag does not. A mug's imprint wraps around a cylinder, a pen's barrel is a narrow strip that curves, and a bag panel is flat but often small relative to the item. Each item also comes in more than one decoration method - some mugs print, some bags embroider, some pens and most metal or glass gifts engrave - and the method decides what file the design has to become, not just how it looks on screen. This page is one of the print-specific product pages in the web-to-print by print product family. It covers the configurator and file mechanics for promotional products and gifts - mugs, pens, bags and similar items - not the pricing or catalogue structure behind them, and not the garment print-area logic covered on the t-shirt and apparel designer page.
A customer designs on a flat screen, but a mug or a pen is a curved surface, so the designer has to map that flat artwork onto the item's geometry before anyone sees an accurate preview. For a cylindrical item, the imprint area is defined by its width (the flat distance around the usable portion of the circumference, not the full circumference, since most mugs reserve a gap at the handle) and its height. Artwork placed near the edges of that area will appear to curve or compress once wrapped, which is why a flat preview alone can be misleading - the designer should render a curved preview, not just a flat rectangle with a dotted boundary.
| Item | Typical imprint shape | What the wrap affects |
|---|---|---|
| Mug | Curved band around the body, gap at the handle | Edge artwork appears to taper; full wrap needs a seam plan |
| Pen | Narrow curved strip along the barrel | Small text becomes illegible fast; one-line layouts work best |
| Tote bag | Flat panel, front and sometimes back | Minimal wrap distortion, but panel size varies by bag style |
| Water bottle | Tall curved band, often interrupted by a handle or strap loop | Similar to a mug, with a taller usable height |
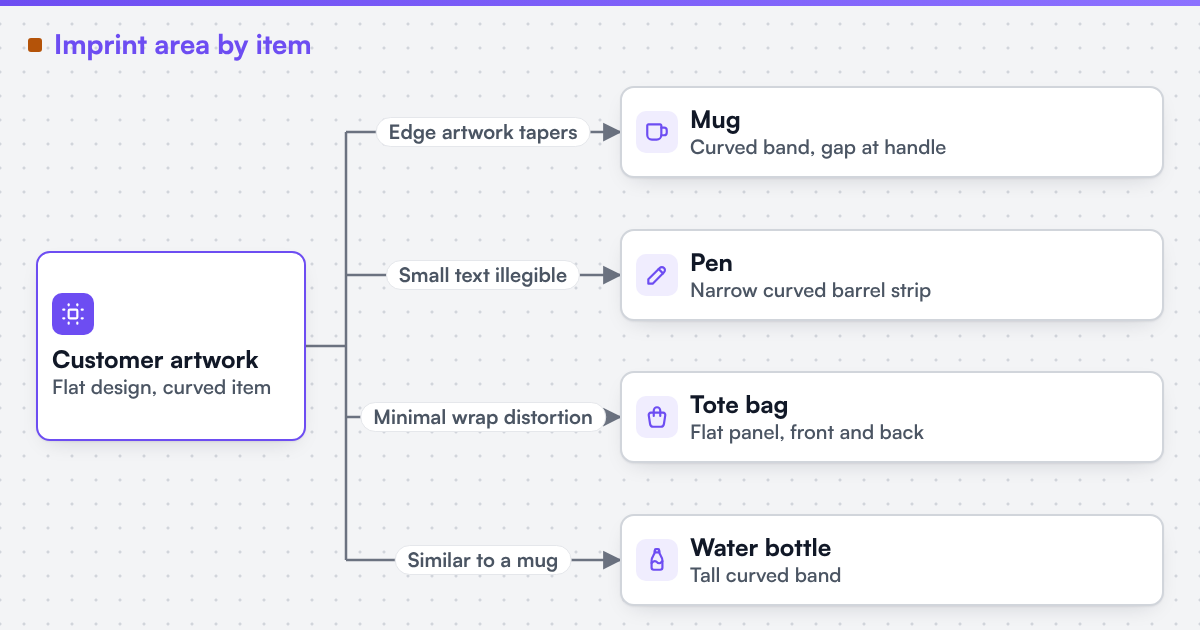 (opens the full-size diagram in a new tab)
Printing and engraving are not two settings on the same file - they are two different kinds of output. A printed imprint is a full-colour raster image: gradients, photographs and multiple ink colours are all fair game, limited mainly by the printer and the item's surface. An engraved imprint is physically cut or etched by a laser or rotary tool, which only has one depth or burn intensity to work with, so the artwork has to be reduced to a single-colour vector path before it reaches the machine - a photograph or a gradient has no meaning to a laser unless it is converted to a halftone or line-art equivalent first, and even then the result reads very differently from a printed version of the same image. A designer that lets a customer approve a full-colour mockup and then silently flattens it for engraving risks shipping a result the customer never actually saw.
Laser engraving equipment is also a regulated class of device, not just a tool. The U.S. Food and Drug Administration classifies lasers into hazard classes (I through IV) under its radiation-emitting product rules, and explicitly lists cutting, welding, engraving and marking systems among the material-processing applications those rules cover. That classification governs the equipment a shop operates, not a credential Web2Print Solutions holds or claims; a designer does not need to expose it to the customer, but a shop running its own engraving equipment should know which class its machine falls under.
| Field | Printing | Engraving |
|---|---|---|
| Colour mode | Full-colour raster (CMYK or item-specific profile) | Single colour, vectorised path only |
| Area shape | Curved wrap or flat panel, as the item requires | Same area, but text and fine detail need more margin |
| Minimum detail size | Limited by print resolution | Limited by laser spot size and material; finer limits than print |
| File format | Raster at print resolution, transparent background where needed | Vector (outlined paths, no live text) |
A configurator should expose these as item-level and method-level rules rather than one generic "upload your logo" box, so a customer seeing a vector-only warning on an engraved pen understands why their gradient logo cannot go there - and sees an alternative, such as a simplified single-colour version, before they place the order rather than after a proof comes back wrong.
We can build custom product configurators and browser design tools that emit print-ready artwork to an agreed specification. For printed items, that means a full-colour raster file sized to the item's exact imprint area, in the colour space the production method expects - a mug's dye-sublimation wrap is not colour-managed the same way as a direct UV print onto a tumbler. For engraved items, it means a vectorised, single-colour path with live text converted to outlines, since an engraving machine has no font engine to fall back on. We engineer print output to a client-specified standard, including colour handling appropriate to each process. The configurator and per-item imprint logic is print product configurator engineering; where a promotional catalogue sells through a storefront such as Shopify, web-to-print on Shopify covers how item options and price reach the cart; and because gift catalogues commonly carry many colour, size and imprint-area combinations per item, too many variants for real print products covers modelling that combination space without exploding it into thousands of SKUs. Netbase JSC, which operates Web2Print Solutions, has delivered 50+ web-to-print platforms, and reusable 2D/3D/360 product preview components are available under their own licence terms.
Scope a promotional products build in a project brief: the items you sell today, which ones print and which engrave, and your current imprint-area and proofing process.
Only after it is adapted. The printed version can stay full-colour; the engraved version needs a single-colour vector conversion, and fine detail that prints clearly may need simplifying to survive engraving.
Items with a flat imprint panel, such as most tote bags, do not need one. Items with a cylindrical or curved imprint area, such as mugs, pens and bottles, need a curved preview so placement near the edges reads accurately.
A laser's spot size and the material's response to heat or abrasion set a practical lower limit on line width and text size that is typically finer than a printer's limit, so fine detail safe for print can fail or blur when engraved.
Ready-made platform
A white-label print store with a built-in designer, print pricing rules and a production queue, set up and hosted by the Netbase team on a yearly plan.
Commissioned build
When the workflow needs rules, integrations or a configurator a standard edition does not cover, the Netbase engineering team scopes and builds it.
Tell us about one product you want to sell online. A senior engineer reads every brief and replies in writing.
Tell us what you need to build, migrate or connect.
Start a project brief